Mister Smith Learning

Alphabet/Letter Recognition and Early Literacy Products

3 Reasons Why I Teach Uppercase Letters First

Jesse Smith

I am going to give 3 reasons why I teach uppercase letters first. The first 2 are just practical, but #3 is the biggest reason

I love my job. I love the kids I work with. In my line of work I tend to work with students that struggle to function in the classroom. I tend to work with students in preschool and kindergarten that struggle to learn their letters. These are the kids that I champion for. 

Big Blog Post on Coloring. Understanding How to Improve Preschool Fine Motor Skills. (Different Grasps, Grasp Solutions, Hand Dominance and Body Positioning)

Jesse Smith

Coloring

Coloring is exercise for the fingers. I consider it to be like running for adults. Some children find it enjoyable but others do not. They find it difficult, so they avoid it.

Coloring is not a frivolous time waster that you only do at the diner before lunch to keep your children occupied. Now, this is a great time to color, but should not be the only time that you color.

Early practice when coloring, can create good habits and it can create bad habits. 

Use Crayons

I only use crayons with preschool students. I like the resistance that they provide compared to pencils or markers. Pencils and markers "slip" across the paper too easily and don't require that much pressure. 

It is essential that you pay attention to how your child is holding their crayon when coloring and drawing.

Five things for Kindergarten Readiness: What I Wish Parents Would Focus On

Grasp

1. Fisted Grasp.

When a child grabs the crayon with his whole fist and colors this way. See pic. This is a very basic and lowest level of grasp. You cannot produce well crafted drawings or coloring with this grasp. 

IMG_4489.JPG

2. Palmar Grasp.

This is when a child grasps a crayon and actually colors with his palm down. See pic. This is slightly higher developmentally then the fisted grasp but still allows for very little control over the crayon. 

IMG_4490.JPG

3. Low tone, low strength grasp.

This grasp can be seen in preschool and kindergarten classes. We have now progressed to using the fingers but we are using all of them and they are spread out along the crayon. What is happening here is, the child is compensating and trying to create stability because their fingers are not yet strong enough to hold the crayon the correct way.

IMG_4492.JPG

4. Four or Five Finger Pencil Grasp.

This grasp is still using all 5 fingers but they are towards the end of the crayon but we are moving towards what we want to see. 

IMG_4493.JPG

5. Tripod Pencil Grasp.

This is what we have been working towards. When holding the crayon in this way we are able to use our fingers and keep our wrist on the surface to create a comfortable and dynamic approach when coloring, drawing or writing. 

IMG_4495.jpg

It is important that preschool aged children begin to develop their finger strength and endurance in order to be able to hold their crayons and pencils over the next several years in which they express their knowledge on paper.

If your child is having difficulty making their way through these stages and developing a proper grasp there are a few modifications that you can make to help the process. 

Mister Smith's Letter Recognition Program

Grasp Solutions

One solution: 

Have your child use broken crayons. Yes. That's what I said. Break your child's crayons in half. (Gasp, cringe) Don't do it right in their faces like you are mad at them. Do try to do it with new crayons (cringe) not totally necessary but I find that children will digest the concept easier if they are new and broken in half. This will make it more difficult to use an improper grasp and make moving towards a tripod grasp easier because their other options are limited. They will be "forced" to use their fingers when coloring. 

IMG_4498.JPG

Another solution:

For kid (and parents) that are 100% against breaking crayons you can wrap a rubber band around the bottom of the crayon (near the black ring). This will give your child a visual and a tactile reminder of where to have their fingers when coloring. I find this most helpful for students that have a low tone grasp. 

Another potential solution:

Have your child hold a coin against their palm with their ring and pinky fingers. This will occupy those 2 fingers and only allow their thumb, index and middle fingers to hold the crayon. I find that this is very effective but requires that the child find and place a coin in their hand every time that they color. 

Rubber pencil grips are for pencils. I am not a fan of putting them on crayons and if you work on the solutions above hopefully they will not need them by the time they move onto pencils. (And I don't suggest using pencils until halfway through kindergarten)

Hand Dominance

If you are working with your child on a consistent basis I encourage you to pay attention to what hand they use for coloring activities the most. I have heard that picking a hand dominance is established between 4-6. I have found it very, very rare that a child hasn't established a hand dominance by the time they were 4. 

You do not want your child switching hands. There are two major reasons why kids switch hands. First. Their coloring hand gets tired. They switch to the other hand that is not tired, even if it doesn't have nearly the same skill and control. Do not allow them to do this, instead encourage a short rest and a quick "hand shake" and then have them get back to work. 

Mister Smith's Lowercase Letter Recognition Program and Lowercase Book

The second reason they switch hands: When they are writing or coloring, they will get to the center of the page (if writing from left to right) they will then switch to their right hand to finish what they were doing. This is something that should be discouraged also. This is not a demonstration of ambidextrous behavior. In children older than 4 years old, this is more of an indicator of right and left brain hemispheres not communicating as efficiently as we want. We then would set the child up with midline crossing activities to help work on that underlying cause. You want to set your child up in activities where they naturally have to.

Example: child in prone position (on belly on the floor) with Connect 4 game in front of him/her. Ask child to only use right hand. Place all of the checkers that he/she will be placing to the left of his/her body to require them to reach across midline to accomplish this activity. 

Coloring in smaller areas

You can give a child a blank piece of paper and say draw something, but I can almost garuntee that this will only occupy them for

Do set your child up with achievable activities. They will not be able to color for extended periods at first, because their hand will get tired. They will not be able to attend that long because that is the nature of a young child. If you give a 3 year old a large area to color, they will most likely scribble all over the place. Too big of an activity will overwhelm your child. When available use coloring pages that excite your child. If they are into monster trucks, have them color monster trucks. If they are into fish, have them color pictures of fish. What they actually color does not matter, it is the fact that they are coloring and motivated to color that matters. 

I suggest starting with small areas. Either by using coloring pages that have small areas already set up or by segmenting a large area into smaller ones (like setting up a grid) by using a crayon. We often consider coloring a solo activity. I often color with my students. I color a spot, demonstrating proper grasp and coloring skills, and then they color a spot. This lessens the tiredness of the child’s hands and they will be able to attend to what they are doing. In addition, they are doing something directly with an adult and the finished product will look halfway decent with your help. This will help to improve their confidence. They will have something that they can be proud of.

IMG_4375.jpg

Positioning

Coloring is a 2 handed activity. One hand holds the crayon and colors while the other hand holds the paper in place. Otherwise, the paper will move around and coloring will

IMG_4487.JPG

The positioning of your child when coloring is often overlooked but important. My favorite position for children to color in is lying on their bellies on the floor (prone position). They will naturally prop themselves up with their elbows and color. This helps stabilize their upper arms and hands which will require that the wrist and fingers do most of the movements when coloring. Also another benefit is that this position will help improve core strength and endurance. Don't be shocked if they cannot hold this position for longer than a few minutes at first. 

IMG_4484.jpg

The other position is sitting. You want your child's body to be straight and sitting up. You don't want them to be slouching. If you are noticing consistent slouching or that they keep their head very close to their work, this could potentially indicate that they have poor eyesight or that they have poor core strength. 

To sum things up. Have your child color. Try to take the information into account when your child is coloring and try to guide them in the right direction. Encourage your child to color. For it to be beneficial it needs to be fun for your child. It will help your child develop the skills they need to be successful in kindergarten.

Five things for Kindergarten Readiness: What I Wish Parents Would Focus On

Jesse Smith

When I work with preschool students, I tend to focus my energy on only a few areas. I like to keep it super simple. This focus will allow for strong growth in these areas and it will lead to improved, functional skills in kindergarten.

Just like anything in life, a balance in these five areas will produce the best results. Only letting your child play will neglect the skills needed for academics in kindergarten, while only focusing on pre academic work will be at the expense of play and socialization.

IMG_4018.JPG

1.Playing

I know this is obvious, but sometimes people look at play as frivolous. For a child play is the biggest and most important “job” of childhood. This is how children learn and interact with the world. Many of the things they do through play will touch on the other four ideas that are presented below.

Allowing your child to play with other children will help develop social skills. Playing with other children is not always easy, but this allows your child to be in situations in which they can learn first-hand about conflict resolution, cooperation, teamwork, and competition. Developing social/emotional skills is a huge part of life. This is when we learn not to hit our friends when they take their toy back. This is where we learn to say please and thank you, or learn to deal with people that do not say please and thank you.

Playing outside with friends is great. Climbing, running, tag, hide and seek is so important.  This helps develop physical skills, balance and motor planning skills.  Playing inside your child can do board games, card games, trucks, dolls, action figures, Legos, blocks, obstacle courses, etc. Try your best to keep your child off of a screen and interact with a game or with others. These are the experiences that will happen in a kindergarten setting. Any kind of productive play will help your child practice for being a student in kindergarten. 

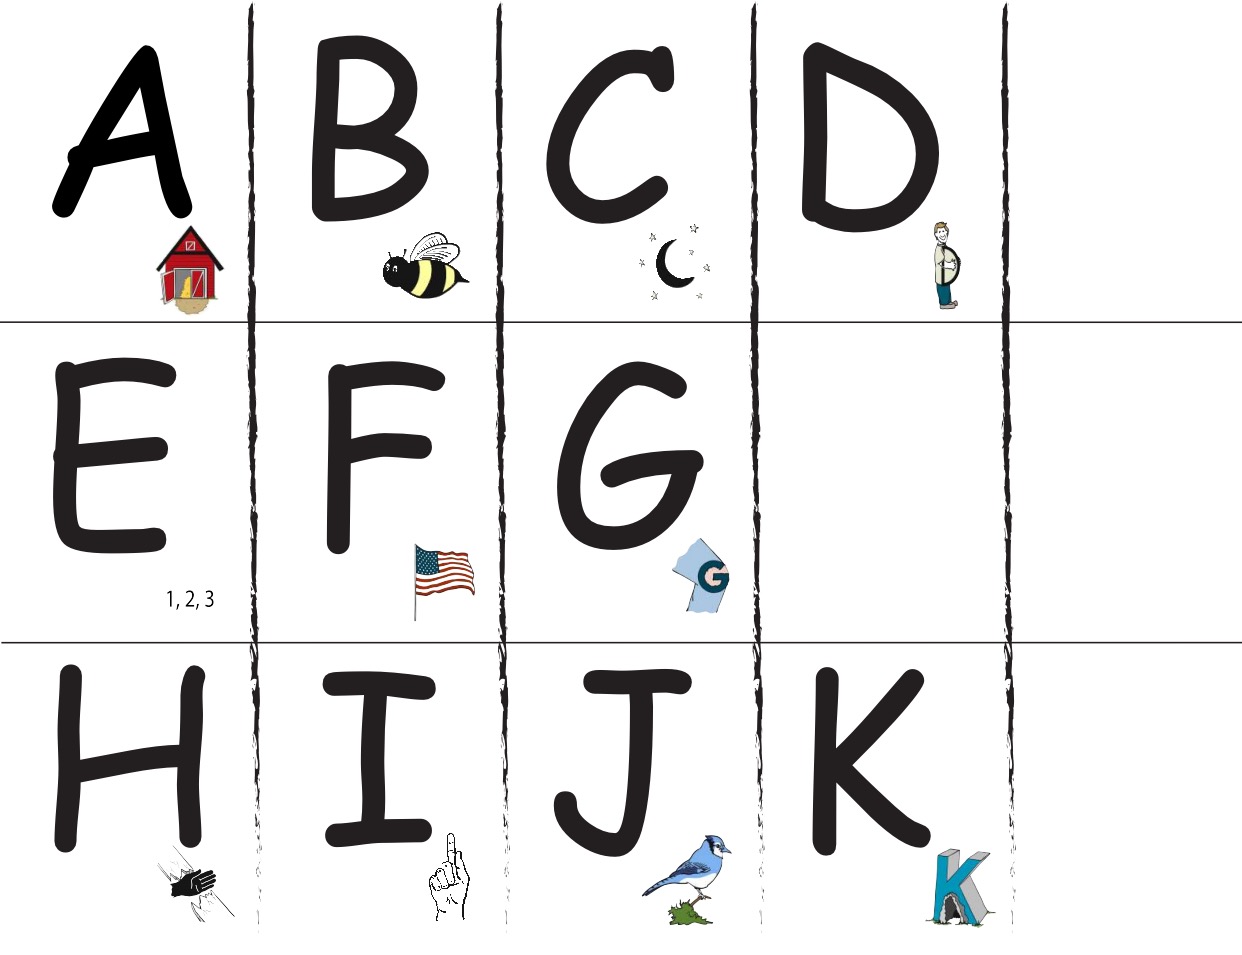
Letter Identification in a fun and effective way

2.Coloring

Coloring is exercise for the fingers. I consider it to be like running for adults. Some children find it enjoyable but others do not. They find it difficult, so they avoid it.

It is important that preschool aged children begin to develop their finger strength and endurance in order to be able to hold their crayons and pencils over the next several years in which they express their knowledge on paper.

Do set your child up with achievable activities. They will not be able to color for extended periods, because their hand will get tired.  They will not be able to attend that long because that is the nature of a young child. If you give a 3 year old a large area to color, they will most likely scribble all over the place. Too big of an activity will overwhelm your child.  


I suggest starting with small areas. Either by using coloring pages that have small areas already set up or by segmenting a large area into smaller ones (like setting up a grid) by using a crayon. We often consider coloring a solo activity. I often color with my students. I color a spot, demonstrating proper grasp and coloring skills, and then they color a spot. This lessens the tiredness of the child’s hands and they will be able to attend to what they are doing. In addition, they are doing something directly with an adult and the finished product will look halfway decent with your help.

More in depth blog post on coloring

3.Cutting

Cutting is necessary in kindergarten. Cutting requires motor coordination that needs to be practiced in order to get good at it. I suggest that you start with Playdough scissors. (This is not because I am afraid of child scissors because they are “safe”. You do not have to worry about them cutting their fingers, but they still cut hair, clothing, carpets, drapes, pets hair…you get the idea.) Playdough scissors will not allow you to cut paper, but they will cut Playdough. This will is a great way to start developing the motor skills needed to be successful with scissors. Cutting play dough builds strength. 

If you do let your child use children’s scissors always supervise them until you are confident they will make consistent good decisions. Start with snipping activities then move onto cutting straight lines. 

Uppercase Handwriting Pages Lowercase Handwriting Pages

IMG_2428.JPG

4.Puzzles

24 piece puzzles are perfect for children from ages 3-5. Puzzles help with improving problem solving skills, fine motor skills, visual motor skills, sorting skills, attention span, and tolerance of quiet time (alone with their own thoughts). In addition puzzles increase confidence, development of persistence and grit, independence, memory, pattern recognition, practice bringing chaos into order (like cleaning a room) but with a distinct ending point and they are just good old fashioned fun.

A child can easily memorize puzzles if they only have one or two in the house. This minimizes the benefit of problem solving and gaining new skills. Do not teach children to use the side pieces when using 24 piece puzzles as there are 16 outside puzzle pieces and this does not narrow down their choices as it would if you were doing a 100-1000 piece puzzle. Give verbal prompts to help the child get started and if needed, allow them to struggle for brief periods. If you just do the puzzle for the child, they won’t learn anything. If they get so frustrated that they give up, then they learn how to give up instead of pushing through difficult things.
 

5.Reading to Your Child

Read to your children. This will expose them to places, things and ideas that you would not be able to expose them to otherwise. This will teach them how to listen, how to sit and enjoy a story filled with interesting information. This will help your children gain knowledge of things that they will need to know going into kindergarten. They should know their shapes, colors, letters (uppercase and lowercase), and sounds would be great too! Numbers, animals, basic household objects and tools, etc. The Mister Smith Letter Recognition Program is an effective and fun way for kids to learn their letters. 

In my preschool sessions, I mostly focus on coloring, cutting and puzzle work. Playing and reading is more of a family activity.
 

As someone who works with kindergarteners everyday, I can confidently say these are the skills parents should focus on to set their child up for success. I hope this helps frame the way in which you might help your pre-school aged student’s readiness.   

How to Use Mister Smith’s Letter Recognition Program in a Kindergarten Classroom.

Jesse Smith

A solid amount of kindergarten students will enter knowing a good amount of their letters and this is great. This will quickly allow them to participate and integrate themselves into the classroom curriculum very easily. 


As a teacher. This is what we want. 


As a teacher. This is not always what we get. 


We all know that we have a few students that will enter with only a handful of letters or no letters at all. 


This is where my Letter Recognition Program can be of the greatest help. 


First thing that we do is assess all of our students and see who is going to need extra help to get caught up and see who is doing just fine. We usually think knowing about 13 uppercase letters is a good cut off point (but this can fluctuate depending on the needs of your class). Anything below that number, they are a good candidate for using the program. (Free Letter Recognition Assessment Pages)


Another good thing to do early in the kindergarten year is read to the class the “Mister Smith’s Alphabet Book”. This will help introduce the concepts of the flashcards to the entire class. The students that already know all of their letters will still enjoy the book and the students that don’t know their letters will begin to look at the uppercase letters in a different light. 


Once you have established a group of “struggling learners” then we need to start introducing the flashcards to them. 


Ideally the kindergarten teacher will have help for at least a small portion of the day and these students can be worked with individually. I know that this is not possible in many classrooms and I would then suggest working with the Letter Recognition Program in small groups. 


I suggest 2 times a day for 10-15 min per student if possible, but one time a day will work. You can potentially send home the flashcards and have their caregiver work on them at home but this is not necessary.


The flashcards come with guidelines and the directions of how to teach each letter are on the back of each individual card. I would suggest that you read through the guidelines and read all of the teachings on the backs of the cards so that you are familiar with the concepts. 

Most students find the process of learning in this way very enjoyable and really enjoy being successful and building upon that success. 

Mister Smith's Lowercase Letter Recognition Program can be used next. This will teach your students how to look at the "tricky" letters and start recognizing them easily.

This will really help prepare them for the next step, learning their sounds with Mister Smith's Sound Cards

It is important that you keep good data on your students because you don’t need to re-teach letters that the student already knows and it helps to to help streamline the process and focus on the letters they need to work on the most. 


We have Mister Smith Name Cards which can be useful to help reinforce the concepts to the students at their desk. We also have uppercase letter wall posters which can be hung up in the classroom. 


We have had tremendous success with many struggling learners. If you have a few students struggling, this approach is worth a shot. I know that having a class full of strong learners and one or two struggling....those one or two can take up a very large portion of your headspace and this program can help you begin to make progress with those students. 


Thank you for listening. I hope you found this helpful. 

How to Teach Sequencing the Letters of the Alphabet

Jesse Smith
demoAlphabetSequenceChunks3355706.jpg

I love puzzles. They are great for teaching self organization and planning skills plus puzzles can be set up to challenge all different age ranges. I view alphabet sequencing as a functional puzzle.

Beginning Phase

When children are learning their uppercase letters with Mister Smith's Letter Recognition Program I also like to simultaneously teach the concept of sequencing the alphabet. 

The very first thing we need to work on is just singing the Alphabet Song clearly. At this point the student does not need to be able to recognize any of their letters, but this is where we can start correcting mispronunciations of certain letters (my son calls an s an x sometimes) and slowing down the L, M, N, O, P section. 

Once we get the song down we can move onto using letters and getting used to one to one correspondence with the letters. This will help the child to start putting one name to one visual symbol at a time while going in a left to right direction. Just these two concepts can be a little tricky for an early learner to catch on to at first. I find that the easiest way to do this is through alphabet "chunks" that imitate the same rhythm as the Alphabet Song. 

We would start by laying out the strips or "chunks of letters on the floor in a random order. Then we would start by trying to find the A, B, C, D chunk. If a child has the ability to do this then great. If not he or she will need to be guided through. 

Teacher: Oh here is the A. Come see! Help me with the rest.

Then going hand over hand with the student we would point and say them at the same time. A, B, C, D....and then let the child finish and see if they will naturally say the letter E as in the song. If they get it then you will act so excited. 

Teacher: You figured out the next letter! The letter E! Can you help me find it!

Once you find the E you can go through the process again. Hand over hand if need be or if they have the concept, he or she could try doing it themselves. 

The beginning phase would continue on like this with just a focus on one to once correspondence. When you say a letter, you point at a letter. That will help them understand that each symbol has a name and the Alphabet Song is not just a song. Plus we get to introduce the fact that we start at the left and move to the right when working with letters.


Next Phase: Letter Identification- then sequence

This phase requires knowledge of a solid amount of letters of the alphabet in order to be successful. They will also need to know how to use one to one correspondence and move from right to left. 

I like to spread out all of the uppercase letters of the alphabet on the floor and have the student start with the Uppercase letter A and progress from there. Then based on the child's skill, I would have them match the letters that are the easiest like O to o or X to x and progress to the more difficult matches. 

IMG_1795.JPG

A few suggestions.

Unless the student is very good with all of the prerequisite skills needed, this should not be an independent activity. (see matching cards to make this more independent) I suggest that the student be supported but not given the answers. Encourage the student and give them hints if they get stuck. Praise them when they are successful.

  • Benefits or what we get from this activity:
  • This will help solidify uppercase and lowercase letter identification.
  • Left to right practice.
  • Functionally puts their letter recognition skills into practice. 
  • Helps the student transition from the logographic stage of reading to the alphabetic stage. 

Have fun!!

Helpful Products:

Alphabet Sequencing Chunks from TpT

Letter Recognition Program and Alphabet Book Combo from TpT

Lowercase to Uppercase Matching Cards (student will be able to complete with more independence)

5 Reasons Why the Mister Smith Letter Recognition Program Works: Alphabet Identification Flashcards

Jesse Smith

This Program is for Parents, Preschool Teachers and Kindergarten Teachers that have children that are struggling to learn and consistently remember their uppercase letters.